
How to Build a Squarespace Website Step-by-Step Guide for Beginners (2025)
Squarespace is a straightforward website builder that handles everything for you - no technical skills needed. You get professional templates, secure hosting, and built-in tools for showcasing work, taking payments, and staying in touch with customers, all in one package.
The drag and drop setup is simple just put things where they make sense, like organizing your workspace. No coding required, and their support team actually helps when you need it.
It's built for people who want a solid, professional website without the headaches or huge expense. Everything works together smoothly, so you can focus on your business instead of figuring out complicated tech.
Let’s get into it!
Start your FREE trial website
Go to Squarespace.com and click Get Started in the top right corner.

Choose a topic or click I'm Just Browsing to see all options. Use the sidebar to filter by type, then click any template to preview it.

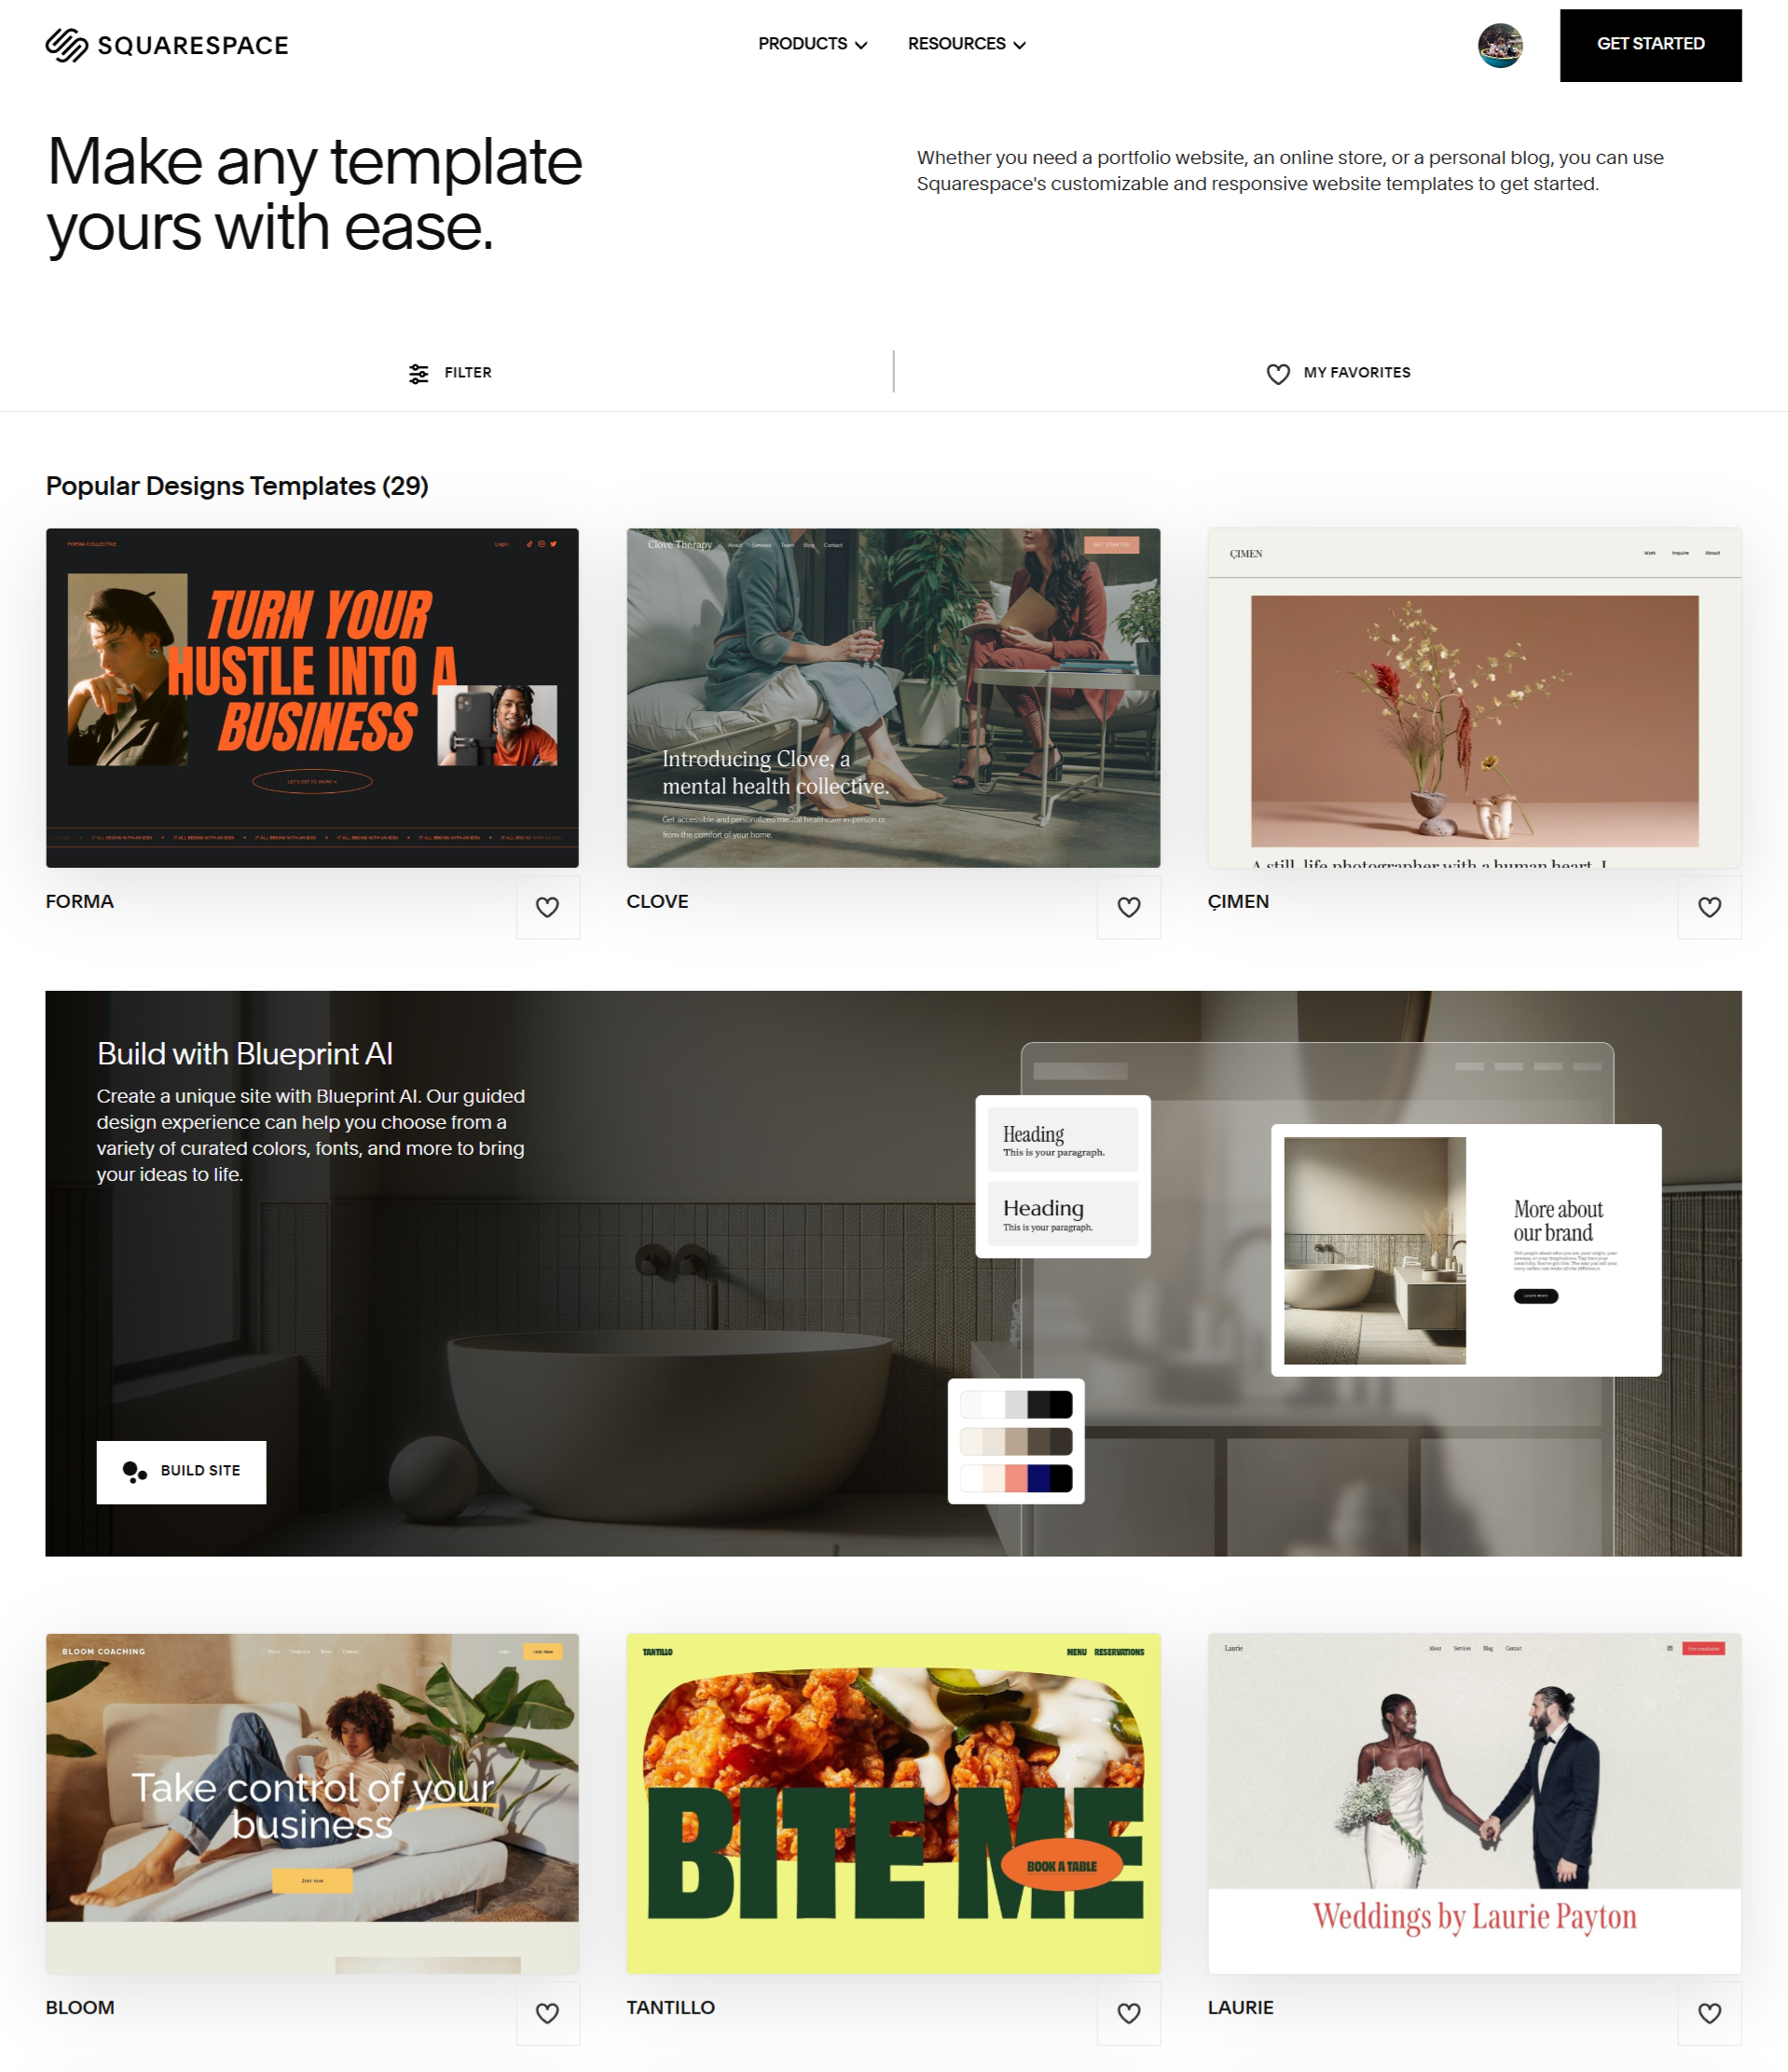
You can scroll through the design, check different color options, or click View Demo Site to see the full layout.
Found one you like? Click Start With This Design and you'll go straight to your trial site. Create your login if needed, and you're ready to build.

How to choose the right Squarespace template
All Squarespace templates work the same way - picking one is just about the look and saving yourself setup time. Every template can be completely customized with the same editing tools.
Pick based on:
Which works best with your content
Which needs the least changes
Which one you like the look of
Important: Once you choose a template, you can't switch to a different one later. You can change colors, fonts, and layout, but to use a completely different template design, you'd need to start over and move your content manually.
Pick something close to what you want from the start.
Blank site
If you prefer to start from scratch, you can choose the blank template option.

Squarespace Free Trial
You get a 14-day free trial to test everything out before paying. You can create as many trial sites as you want - each new site gets its own 14-day trial.
When you're ready to go live or the trial ends, you'll need to buy a subscription to keep your site active. Without upgrading, your work gets deleted - so don't wait too long once you've got things how you want them.
Navigating Your Squarespace Dashboard
Your dashboard shows all your websites in one place. Switch between Dashboard and Domains at the top to see your sites or any domains you've bought.

You'll see a list of all your websites - ones you created or ones you help manage. Click any website to open the editor.

Each site shows useful info like trial expiration dates, renewal dates, and connected domain names. You can add tags to keep multiple sites organized.
Click the three dots next to any website for more options - access settings, make a backup copy, or pin important sites to the top of your list.

Your Squarespace Website Sidebar
The sidebar is your main control center for everything on your site. There's a lot packed in here, so let's cover the key ones you'll use most.

Website
Pages: Add, remove, and rearrange all your website pages
Styles: Change fonts, colors, buttons, and other design elements (also accessible via the paintbrush icon in the top corner)
Assets: Your image library where all uploaded photos are stored and organized
Selling
Shop settings and data - orders, inventory, discounts, and other sales tools if you set up online selling.
Invoicing
Send invoices, proposals, contracts, and estimates directly from your site. Includes project management tools.
Content & Memberships
Manage courses, member sites, or paid blog content. Track revenue and payment plans.
Donations
Set up donation options for your site.
Scheduling
Manage your calendar, clients, and appointments through Acuity.
Marketing
Email campaigns, pop-ups, and announcement bars.
Contacts
All your leads, subscribers, newsletter sign-ups, and customers in one place.
Analytics
Website data including sales, visitor activity, and traffic info.
Settings
Click the cog icon at the bottom for site settings, make your site public or private, add business info, connect domains, set up billing, and social links. Go through these settings early and fill in your business details.

Tip! Squarespace sometimes moves settings around. Can't find something? Hit the '/' key to open the search tool and find what you need quickly.

Help
Click the question mark icon at the bottom of the sidebar for links to Squarespace's help center and tutorials.

Edit Your Squarespace Website
Navigate to your Pages panel by going to Website > Pages in the sidebar. Here, you will see a list of all of your website pages divided into two sections:

Main Navigation
Pages here show up in your header menu

Not Linked:
Other pages that don't appear in your navigation.
Drag and drop pages to reorder them or move between sections.
Adding pages
Click the + icon next to either section. Choose from regular pages, blogs, stores, portfolios, courses, and more.

Page settings
Click the cog icon next to any page name for settings:

General: Change page title, URL, enable/disable, set passwords, duplicate pages
Navigation: Show/hide header and footer on specific pages
SEO: Add meta descriptions and SEO titles
Social image: Custom image when page is shared online
Advanced: Add custom code if needed

Utilities
At the bottom of your Pages panel:

System Pages: Customize your 404 page, checkout, and lock screen
Website Tools: Add custom CSS, announcement bars, and pop-ups
Trash: Deleted pages stay here for 30 days, restore or permanently delete
Editing Your Page Design
Every page is built with sections stacked on top of each other.

Adding sections
Click Edit, then the blue Add Section button. Choose blank sections or pre-designed ones.

Section settings
Hover over any section for options:

View Layouts: Automatically reshuffle section layout
Edit Section: Adjust spacing, rows, height, backgrounds, colors
Duplicate Section: Copy sections as backups
Save Section: Reuse sections on other pages
Reorder: Move sections up or down
Remove: Permanently delete sections
The Fluid Engine grid
Squarespace uses a grid system that lets you position blocks (text, images, buttons) anywhere within sections. Press 'G' on your keyboard to see the grid lines. As you drag blocks around, they automatically snap to grid positions, making it easy to create professional layouts with even spacing.
The default grid is 11 x 11, but you can customize this for each section by clicking Edit Section and adjusting the grid settings:

Rows: More rows = longer sections
Gap: Control spacing between grid units - no gap, standard, or custom spacing
Fill Screen: Toggle on to set padding around your section, toggle off to use the full section height

Blocks
Sections contain content blocks - images, text, buttons, and more. Each block can be dragged anywhere on the grid and has its own settings (double-click to access them). To add blocks, hover over a section and click + Add Block in the top left corner, then choose your block type from the popup.

Mobile editor
One of the best features - you can customize your mobile site almost completely independently from desktop. Click the mobile icon in the top right to preview mobile, then click Edit to rearrange blocks however you want without affecting the desktop version. You can't delete blocks entirely or reorder sections, but you can move content around freely.

Editing Site Styles
Site styles control your website's overall look fonts and colors. Access them by clicking the paintbrush icon in the top right corner or going to Website > Site Styles in the sidebar. A menu opens on the right side of your screen. Remember, site styles are site-wide changes apply everywhere that element is used.

Site Styles Themes
Choose from preset combinations of fonts and colors based on different moods: professional, playful, sophisticated, friendly, bold, or quirky. This gives your website a distinct vibe with one click. Great if you haven't decided on brand fonts or colors yet and want to explore options. You can always customize these themes further.

Customizing fonts
Go to Site Styles > Fonts to access font options:

Font Packs: Dozens of professionally designed font pairings. Choose between sans-serif, serif, or mixed styles. Click any pack to see how it looks on your site in real time

Headings, Paragraphs, and Buttons: Customize fonts for different text types. Assign new fonts from Squarespace's huge library and adjust font size, weight, line height, and letter spacing


Assign Styles: Set specific fonts for various elements like your site title, navigation links, announcement bar, blog elements, and portfolio sections

Customize Your Color Palette
To customize your website colors, go to Site Styles > Colors.

Customize Your Color Palette
Main Color Palette: Click Edit Palette to select custom colors for each swatch or choose from Squarespace's preset palettes


Section Color Themes: Ten automatically generated themes from Lightest 1 to Darkest 2, based on your main palette. Click into any theme and customize individual elements by clicking color swatches

Adding Features to your Squarespace Website
Store
Website > Pages > + > Store. Select Create New Store, choose a layout, and name your store. Click Edit to customize your store homepage or + to add products. Choose from physical products, digital downloads, services, scheduling, courses, and more. You need a Business plan or higher to access e-commerce features.


Portfolio
Similar to a blog but designed specifically for showcasing projects, galleries, and case studies with better image handling. Website > Pages > + > Portfolio. Choose layout, name it, and customize like any other page.

Course
Host and sell courses directly from your site. Website > Pages > + > Course. Select layout and name your course. Customize the Course Overview page and add lessons and modules under Course Content.


Set pricing under Pricing Plans in the sidebar - choose fixed amounts or subscriptions, then create a sales page.

Launching Your Squarespace Website
Before going live, click the arrow in the top right corner to preview your site. Scroll through every page and check that all links work and buttons function properly - broken links hurt your search engine rankings. Also preview the mobile version by clicking the mobile icon and scroll through thoroughly to make sure the design looks good on phones.

Connecting domain and choosing a plan
Go to Settings (cog icon at bottom of sidebar) > Domains & Email > Domains. Either purchase a new domain through Squarespace by clicking Get a Domain, or connect an existing domain by clicking Use a Domain I Own. You'll also need to choose a subscription plan Squarespace offers four different plans with different features. Business Plan works for most people unless you're planning heavy online selling.


Publishing your site
Ready to launch? Go to Settings > Website > Site Availability and change your site status to Public. Your Squarespace site is now live and accessible to the world!
Want Your Website Built Without All the Hassle?
Look, we get it. You're running a business, and you've got more important things to do than spend weeks figuring out website builders. Maybe you started reading this guide and realized it's more work than you bargained for. Or maybe you just don't have the time to sit down and build it yourself - you've got customers to serve and jobs to finish.
That's exactly why we created Web Design Ventures.
You shouldn't have to become a web designer just to get a professional website for your business. You need something that works, looks good, and brings in customers - without you having to worry about the technical stuff.
Here's what we do differently:
$0 down - no big upfront costs
$175 per month - predictable, affordable pricing
We build it, we maintain it - you never have to touch the technical side
You focus on what you do best. We'll handle your website completely - from building it to keeping it running smooth, updating content, and making sure it's always working for you.
Ready to stop worrying about your website?
Contact Web Design Ventures today and let's get your professional website built the right way - without you having to lift a finger.
Because your time is better spent running your business, not building websites.